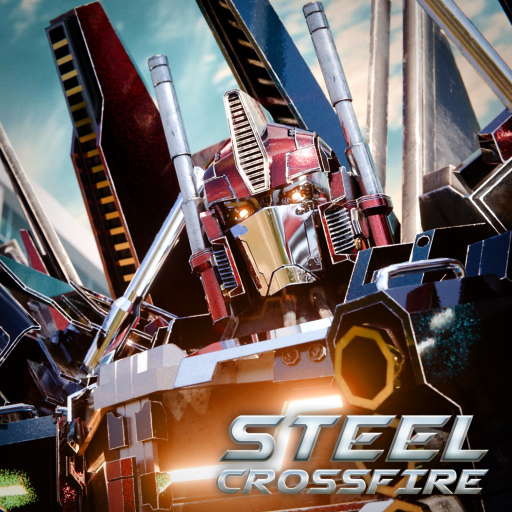
Steel Crossfire Map Guide: Modes, Routes, and Cover Checks
Use this Steel Crossfire map guide to review documented locations and modes, then build safe routes around cover, height, and live objectives.
Open the official Steel Crossfire Roblox experience to verify the current live build.
The community archive documents Foundry, Airbase, City, Factory, Egypt, and Lost city/Metropolitan as Steel Crossfire locations. It also lists Control Point Capture, Domination, Timed Death Match, and Kill Confirmed as game modes. That gives you a reliable orientation layer, but the live vote, loading screen, and objective markers decide what is actually active in your match.
Repeat the route before accepting the result.
Use the documented map pool as an index
The names below come from an explicitly unofficial community wiki. Use them to recognize searches and older footage, then confirm spelling and availability in the current game. “Lost city / Metropolitan” is presented carefully because the archive links Lost city to a Metropolitan page, while newer video coverage also calls a map Metropolis. Those labels may reflect renaming, informal usage, or separate content; the available facts do not justify collapsing them into one certain official name.
| Location | What is documented | Tactical check to make live | Evidence note |
|---|---|---|---|
| Foundry | Listed in the community map index | Identify open lanes, hard cover, and objective route | No complete current mode matrix archived |
| Airbase | Listed through the community Base/Airbase link | Check airspace, roofs, and ground approach | Verify the live display name |
| City | Dedicated community page and mode notes | Use building cover and watch high ground | Community page calls it an early, smaller map |
| Factory | Listed in the community map index | Mark interior exits and transformation space | Detailed route evidence is limited |
| Egypt | Listed in the community map index | Check sightlines before committing to open ground | Detailed route evidence is limited |
| Lost city / Metropolitan | Community index links the two labels | Verify the current loading-screen name and geometry | Do not assume every similar name is the same version |
The following update video includes a newer map discussion and aerial footage. It is useful for recognizing the balance between open sky and building cover, but the creator's observations are not an official complete map specification.
Read City as a concrete route example
City has the clearest dedicated archived description. The community page calls it the first map made for the predecessor, describes it as relatively small, and notes a collection of similar buildings with a larger grass area in the middle. It also highlights high ground and winding turns, with snipers often using elevated positions.
That description suggests a useful route-reading method without inventing an exact spawn map. When you load into City:
- Find the central open area without immediately crossing it.
- Identify two covered building-to-building paths around that center.
- Check roofs and upper angles before staying in a long lane.
- Choose where Bot Mode gives you better control than a fast transformation.
- Keep one Vehicle or Jet escape that does not send you deeper into exposed ground.
The community City page lists King of the Hill, linked to Control Point Capture, and Timed Death Match. Objective play changes the route. A safe perimeter path may be valuable in death match but too slow when your team must contest a point now.
Adapt the route to the game mode
The four documented modes reward different information. Control Point Capture and Domination center the fight on positions, so arrival timing, cover near the objective, and a route back after respawn matter. Timed Death Match emphasizes favorable engagements over unnecessary exposure. Kill Confirmed adds the need to consider where a defeated player's confirmation appears and whether collecting it is safe.
These are general objective-reading principles, not undocumented scoring rules. Always read the live mode instructions. If the client uses a different name, score target, or number of objectives, the live presentation wins.
Use this mode-first checklist:
- Control Point Capture: locate the active point, nearby hard cover, and at least two entrances.
- Domination: check how many positions are active and which route lets you reinforce rather than arrive alone.
- Timed Death Match: avoid crossing open space simply because the timer is running; preserve favorable angles.
- Kill Confirmed: decide whether a confirmation is safe before leaving cover, and watch for opponents using it as bait.
Do not use Jet Mode just because the sky is open. Open air can increase visibility. Buildings can provide cover for a pilot, but they can also hide opponents or cut the camera. Use short altitude changes tied to a destination.
Build a reusable three-pass map read
On the first life, learn the route rather than demanding a perfect score. Pass one is orientation: spawn direction, objective, major cover, open lanes, and vertical landmarks. Pass two is pressure: where opponents appear, where teammates stall, and which lane produces bad engagements. Pass three is adaptation: change one route, form, or weapon decision.
Keeping the change small matters. If you switch character, route, form, and objective at once, you cannot tell what fixed the problem.
A concise match note can contain:
- Map name exactly as the current loading screen shows it.
- Mode and objective markers.
- One safe ground route and one vertical threat.
- A location where transforming helped.
- A location where transforming exposed you.
- The one change to test next match.
This method remains useful even when a map rotates or a patch moves cover. You are learning how to read space, not memorizing an unsupported coordinate list.
Choose forms around geometry
Bot Mode provides the full direct-combat control set, so use it where aim, parry, melee, reload, or weapon switching matters. Vehicle Mode is best tested on routes with enough ground space to steer, boost, and drift. Jet Mode solves height changes and aerial approaches when the selected character supports it.
Before transforming, name the landing or exit point. “Get away” is too vague. “Reach the far building corner,” “drop behind this wall,” or “climb above the next roof line” gives you a route you can evaluate.
The archived map evidence does not provide official boundaries, spawn coordinates, pickup locations, or current destructible-object rules for every map. Follow the live geometry. If an object blocks, breaks, moves, or cannot be grabbed, treat that observation as patch-specific until confirmed more broadly.
Frequently asked questions
What maps are documented for Steel Crossfire?
The community index lists Foundry, Airbase, City, Factory, Egypt, and Lost city/Metropolitan. Verify the current pool and display names in the live game.
What modes are documented?
The community page lists Control Point Capture, Domination, Timed Death Match, and Kill Confirmed. Live instructions determine the current rules and scoring.
Which modes are listed for City?
The dedicated City page lists King of the Hill, linked to Control Point Capture, and Timed Death Match.
Is there an official interactive map?
The archive includes a community interactive-maps page, not an official complete tactical map. Use current loading screens, objectives, and in-game geometry as the final reference.